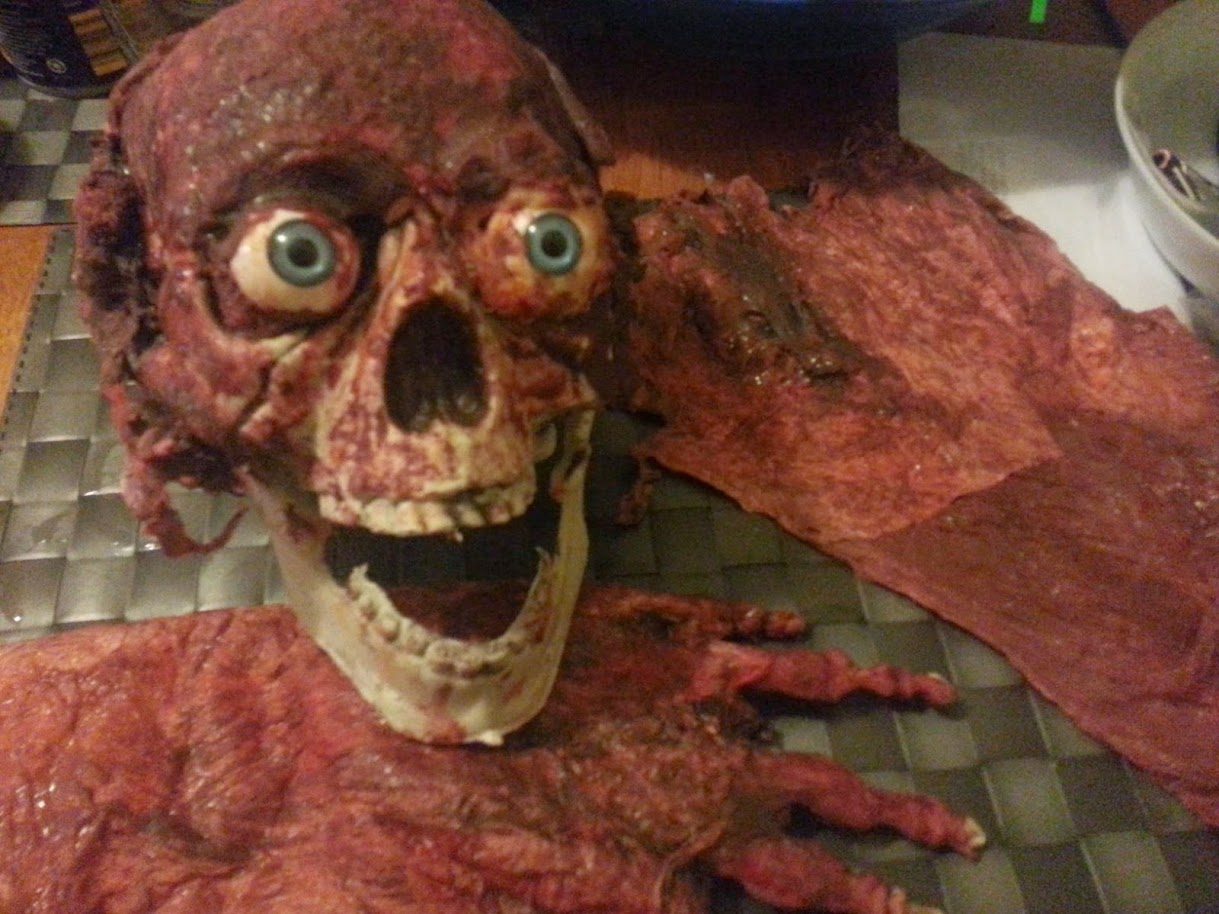
Build an exposed-bone Halloween prop from cardboard tubes, cotton wool and liquid latex, then use dried colour samples and a dabbing finish to separate bone from torn-looking edges. Start with one small piece that rests on a table. You are making a lightweight display prop for a photograph or set dressing.
Watch the original demonstration
Watch the original episode, then use the written guide to plan your own version. Older episodes may include extra demonstrations or reviews.
Exposed Bone Tutorial | Cheap As Special Effects Tutorial
Cardboard, cotton and latex become exposed-bone props for a haunted-house build. Watch on YouTube with age verification.
This archive video requires age verification on YouTube. Open it there to watch.
Darker • simulated gore. This project stays on the workbench and off performers. It is not a skin appliance or a guide to hanging, moving or pumping blood through a prop.
The original Exposed Bone Tutorial develops this approach for a haunted-house build. The version below keeps the job to a manageable tabletop detail. The video may require YouTube age confirmation.
Gather the materials
Use cardboard tubes, loose cotton wool, prop-making liquid latex, suitable colouring materials, a small disposable mixing surface, applicators and a protected work surface. Add a piece of card to support the finished display.
Choose white or pale bone colour, a flesh tone and small amounts of red and dark colour. Check the latex manufacturer's instructions for compatible colouring, handling, ventilation and clean-up. Test the actual products together before committing to the whole piece.
Avoid natural-rubber latex if you have a known latex allergy. Keep tools used with latex and paint separate from food utensils. Let each coating dry as directed before working over it.
1. Make a hollow shape
Choose a tube with a diameter that suits the intended photograph. Roll or reshape the cardboard if you want a narrower section. You do not need a complete skeleton to make one convincing glimpse.
Keep a visible opening at one end. In the source tutorial, the tube's hollow centre helps suggest the interior of the fictional bone. That opening gives you a useful detail without sculpting everything from scratch.
Position the tube on the supporting card so it rests securely. Check the shape through the camera before building texture. If the opening disappears at the intended angle, change the arrangement now.
The beginner effects guide helps define what that one view needs.
2. Build irregular edges
Apply a coating of latex to the cardboard and allow it to dry according to the product instructions.
Pull small amounts of cotton wool apart. Work latex through the cotton and place it around selected edges, concealing the clean cardboard rim. Build small uneven areas rather than wrapping the entire tube in one uniform fluffy blanket.
Leave some of the pale bone area exposed. The contrast between a simpler central surface and a ragged border makes the different parts easier to read.
Let the build dry before adding more. Inspect it from the shooting position. Add texture where the photograph needs it, rather than chasing every bare millimetre.
3. Let a dry sample choose the colour
The source tutorial shows coloured latex looking lighter while wet and darker after drying. Treat that as a reason to test your particular materials.
Make a small swatch of each proposed colour on scrap card or a spare piece of the same build. Record what went into the mix, let it dry, then compare it with the intended background.
Choose the dried result. A wet mixture that looks perfect in the pot can send the finished piece somewhere else entirely.
Keep the successful swatches beside the prop while colouring. They are more useful than trying to remember exactly which muddy red looked right yesterday.
4. Dab on the finish
Place the pale colour along the exposed bone shape. Use flesh colour around the built-up border, then introduce smaller dark and red areas where they help define the texture.
Dab with a suitable applicator instead of dragging long parallel strokes across everything. The tutorial uses this approach to avoid an obviously painted, streaky surface.
Vary the marks. Leave quieter areas between stronger ones. The prop-weathering guide develops the same habit of giving surface changes a reason.
If you plan to add stage blood, test it separately against the dry finish. Use the fake-blood camera test to check appearance and transfer before dressing the final arrangement.
Finish with a four-line camera check
Write these notes beside a photograph:
- Bone: Can the pale shape and hollow opening be recognised?
- Border: Does the cotton read as built texture rather than loose fluff?
- Colour: Does the dried finish keep the parts visually distinct?
- Frame: What can be simplified or hidden outside the intended view?
Change the weakest part, then photograph it again. Keep the successful frame, dried swatches and a record of the materials together.
Explore the Splatter VHS practical FX page for more studio work. For this build, finish one useful piece and give it a clear place in the photograph.